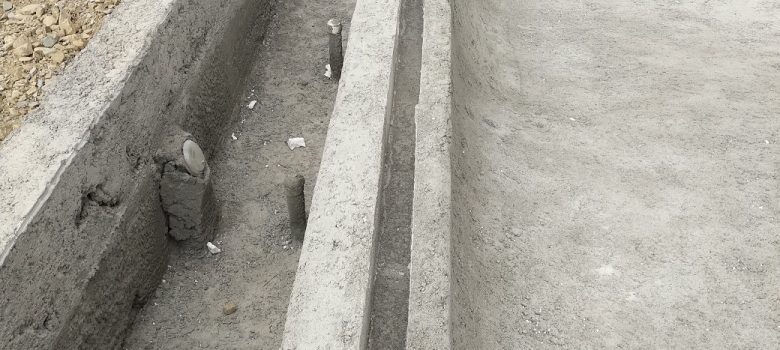
When it comes to acrylic sheet related leaks, whether in an aquarium, pool, submersible or other setting, there are three main causes and two of them are related to rebate.
Before we get to the rebate related leaks and their repair, we should mention that the other main type of leak is silicone failure. Here’s what you need to know about silicone failure:
Silicone Leaks
Silicone leaks are the most common form of acrylic window repairs. This is typically caused by improper installation or weathering.
While the extent of the leak will have to be determined, technicians are often able to repair these issues with a patch instead of a complete seal replacement, saving the owner time and money.
With these repairs, the vessel must be drained and remain dry during the complete repair process.
Now let’s move on to the two rebate related leaks.
Rebate Failure Leaks
Rebate failure leaks occur when fractures in the rebate penetrate either the interior rebate cavity or the exterior of the acrylic sheet.
Technicians can remove the panel to repair the source of the leak and will inspect the rebate structure for integrity during the acrylic window repair. The vessel must be drained and stay dry throughout the process.
Rebate Waterproofing Separation
Rebate waterproofing separation is caused by the improper application of waterproofing compounds. In these cases, the waterproofing compound has often separated away from the concrete substrate while still adhering to the silicone sealants.
During the window repair process, technicians will remove the window, sandblast the rebate and glaze the panel to eliminate the leak for good. This process naturally requires that the vessel be drained and kept dry until repairs are complete.
Here is some additional rebate-related information from the Handbook of Acrylics:
When it comes to aquariums, the best installations are the simplest installations.
It is recommended that there be a concrete blockout larger than the panel size, typically one inch all around. This blockout needs to be waterproofed prior to the panel being set and sealed.
Temporary brackets or shoring should be used to hold the panel in place until the tank is filled.
The water pressure should be what holds the panel in place. It is good practice to reinstall the temporary clamps or shoring onto the panels prior to draining a tank. That means if you are making repairs to rebate, technicians may want to reinstall temporary clamps or shoring.
If the tank is to be drained often or the geometry of the panel is such that the water pressure is not sufficient to hold the panel in place, then permanent clamping or supports should be considered.
Acrylic panels also need to be fully supported on the bearing face.
The industry standard is to set the panel in the window cavity, set back slightly from the concrete. The gap between the panel and the concrete is then filled with a non-shrink grout, thus providing a continuous even bearing condition.
The compressive strength of acrylic is three to four times greater than the best concrete, so as long as there are not large rocks in the mix, point loading will not be a problem to the acrylic panel.
The grout/concrete will give way before the acrylic panel.
The bearing surface of the acrylic is recommended to be at least three inches in concrete and equal to the panel thickness up to eight inches. The minimum bearing surface allows for general construction tolerances and also insures that there is room for rebar with coverage in the bearing area.
The bearing being equal to the thickness is good practice to keep the edge of
the panel out of view.
One more thing as it relates to leaks and fixing acrylic windows – often what may appear to be an issue with an acrylic sheet is actually not serious and is just an indication that the sheet needs polishing.
Polishing Acrylic Windows
It’s important to note that a good window polishing service can restore your acrylic window to its original beauty.
Over time and use, acrylic windows may start to degrade. They may show scratches and crazing, which can be eliminated.
The process starts with an aggressive abrasive and proceeds with incremental steps until a 1-micron optical finish is achieved. In some cases, this intricately detailed process can even be conducted while sheet remains in service.
Beware of inexperienced window polishers, however. Many will leave visible distortions that reflect light abnormally. Always choose an experienced service provider if you need acrylic window repair.
